- From 40percentclub
- Buy from Keyhive
To be honest, I mostly got the gherkin to practice soldering. I didn’t really know what I was getting myself into. The Gherkin is a …well, it’s a boutique board for a passionate community. The creator has been through endless variations of this pattern and it works really well for them.
For me…. no, nope, no. In terms of the final result, the board is super cramped for my hands and wrist size. It hurt just to put my hands on the homing keys. The key spacing is about as tight as they can make it and keep using standard cherry profile caps. The layout doesn’t work me either, even today now that I’ve cut down to a three row layout.
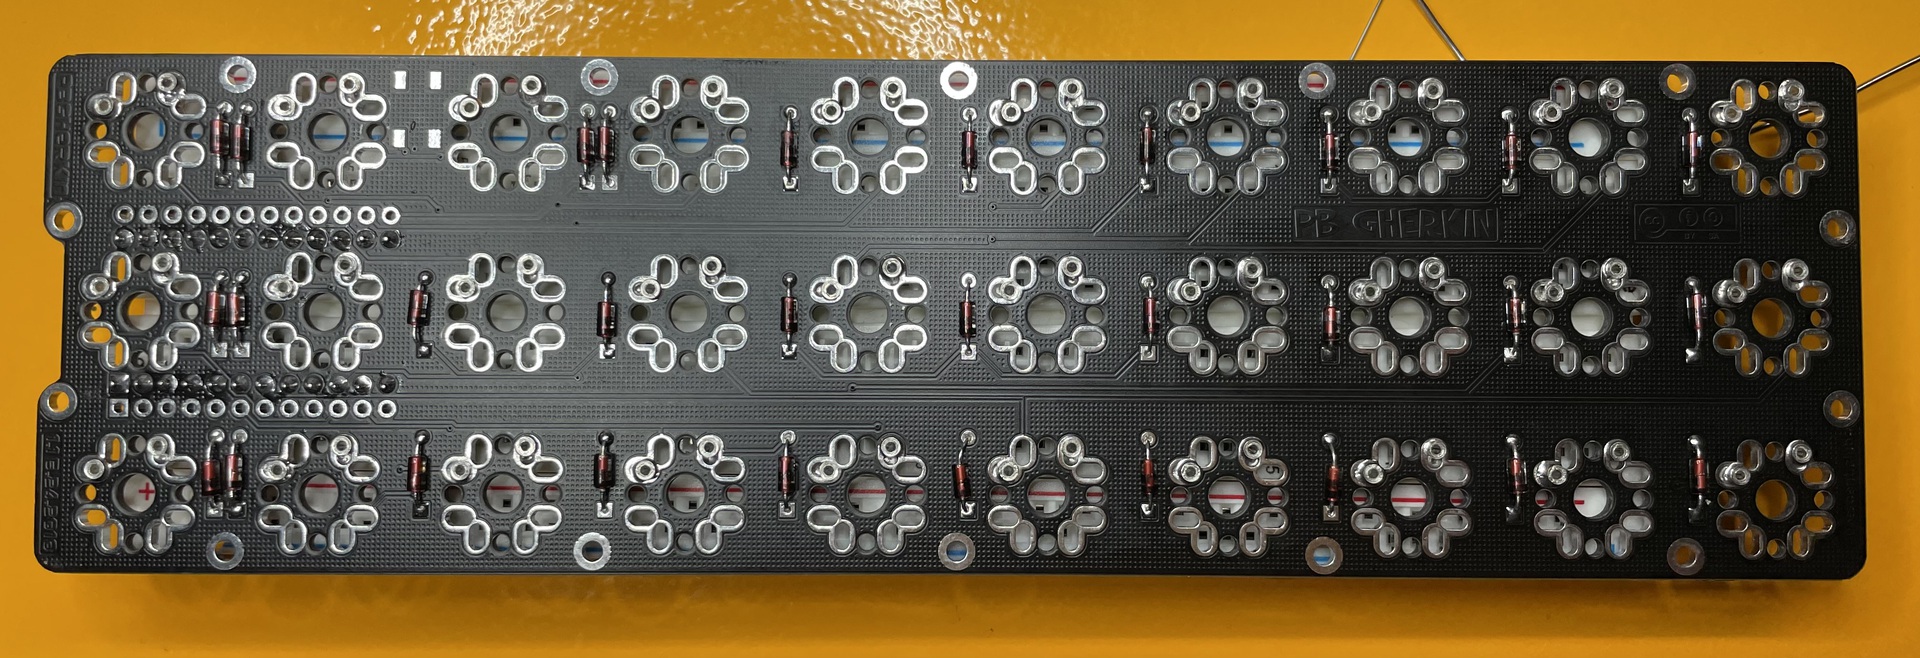
In terms of the build, the PCB is fully reversible and uses through-hole diodes. While you can use Mill-Max sockets (as I did) to enable hotswap, the board is really designed with soldered switches in mind. There are some design decisions that make this an oddly challenging board to build.
Build Eccentricities
There are no silkscreens to indicate proper placement of the MCU. One must know the convention that the square pad corresponds to the TX0 pin. It’s also unclear which header rows to use for either side. I just kinda picked a set at random and, while it worked for me, I have no idea if I just chose wisely or if the other set would have worked fine too.
While most of the photos on the website show a soldered MCU, I recommend socketing the CPU using low profile headers. The other option is to pick the row of MCU headers that let you put the MCU “chips up” (pro micro compatible boards only have chips on one side) so there’s no risk of shorting the key switches against the controller.
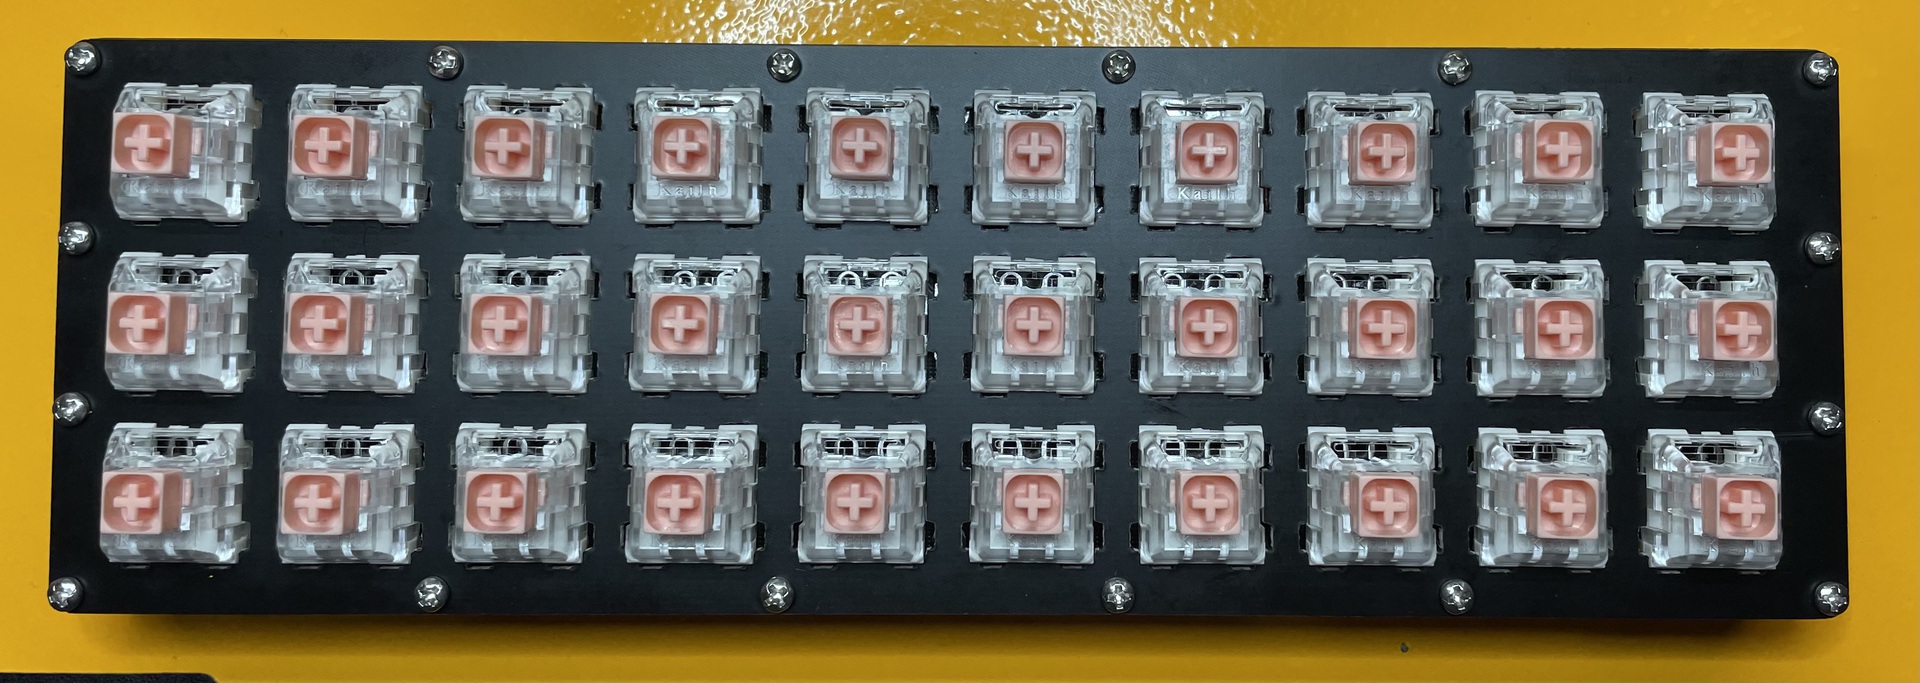
Where this board gets super wonky, in my opinion, is the key switch holes. They’re designed so you can put “any” switch in there in any direction. It’s unclear to me if you can mix and match switch types and locations. The end result though is those long openings one can see in the photos below. The last photo below really shows the resultant drama. All those keys are crooked just a little bit. The main reason is that I chose to use Mill-Max sockets. Those long openings make it nearly impossible to get the sockets in the right place and keep them straight. Also, it’s almost impossible to get a solid attachment without pouring lots of solder into the opening. The “correct” build is probably to solder the switches in place after making sure they’re super straight in the plate. Given, though, that the plate openings are designed to hold several types of switches, they’re not perfect for any switch and I suspect one would still get crooked switches.
Summary
This is a niche board for a niche community that has, in my opinion, a lot of build problems. Even if the layout and size were appealing, the board eccentricities would lead me to seek another solution.