sungo.io
About - RSS - CodeNavi10
Summary
- Vendor: KeyHive
- Site: https://keyhive.xyz/shop/navi10
- Style: Navigational cluster with four arrow keys and six open keys
- Key Switches: Gateron Silent Brown
- Keycaps: F10 flats
My Thoughts
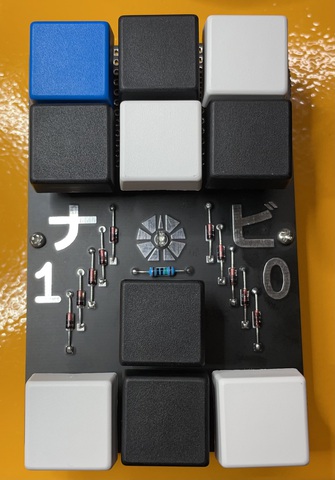
The Navi10 was the first keyboard-like thing I built. It’s a pretty simple build and is designed to be easy for newbies. It comes with instructions etched on the backplate and has a built-in diode bender to ensure a good looking build. It supports Cherry style switches and is designed for the switches to be soldered. The holes are large enough for Mil-Max hotswap sockets, though see below if you’re going to try it.
There are two things to note, however. First, that LED in the center is fucking bright by default. “Distract incoming planes” level of bright. It is possible to turn that down but not without customizations in the firmware that are distinctly not-newbie friendly.
Second, key switch selection is sadly important. (TL;DR: I recommend PCB-mount switches like these Gaterons.) There’s no switch plate so there’s nothing to support and align the switches. If one is soldering the switches, plate mount switches can be used, with caveats. They’ll sit flat but will wobble a bit. If one uses Mil-Max sockets, however, even the super tiny 0305s, plate mount switches will not sit flat and are prone to rocking. That eventually will damage or break the pins. Perhaps more importantly, without a plate, regardless of whether the switches are soldered, plate mount switches will be crooked after installation. There’s essentially no way around it.
The best solution I came up with was using PCB-mount switches, like these Gaterons, via NovelKeys. PCB-mount switches have two extra legs that make the switch much more stable and mostly prevents crooked switches.
All-in-all, this is pretty easy build that’s newbie friendly and does a good job of exposing one to the basics of building a larger board.
Images
There are no affiliate links present on this site. I receive no compensation, monetarily or otherwise, for outbound links. Hell, if I'm linking to a vendor site and you know of an open hardware equiv, please let me know so I can link there instead.
